To move from manual whitelisting mode to auto whitelisting mode, provided your plan offers this feature, follow these steps.
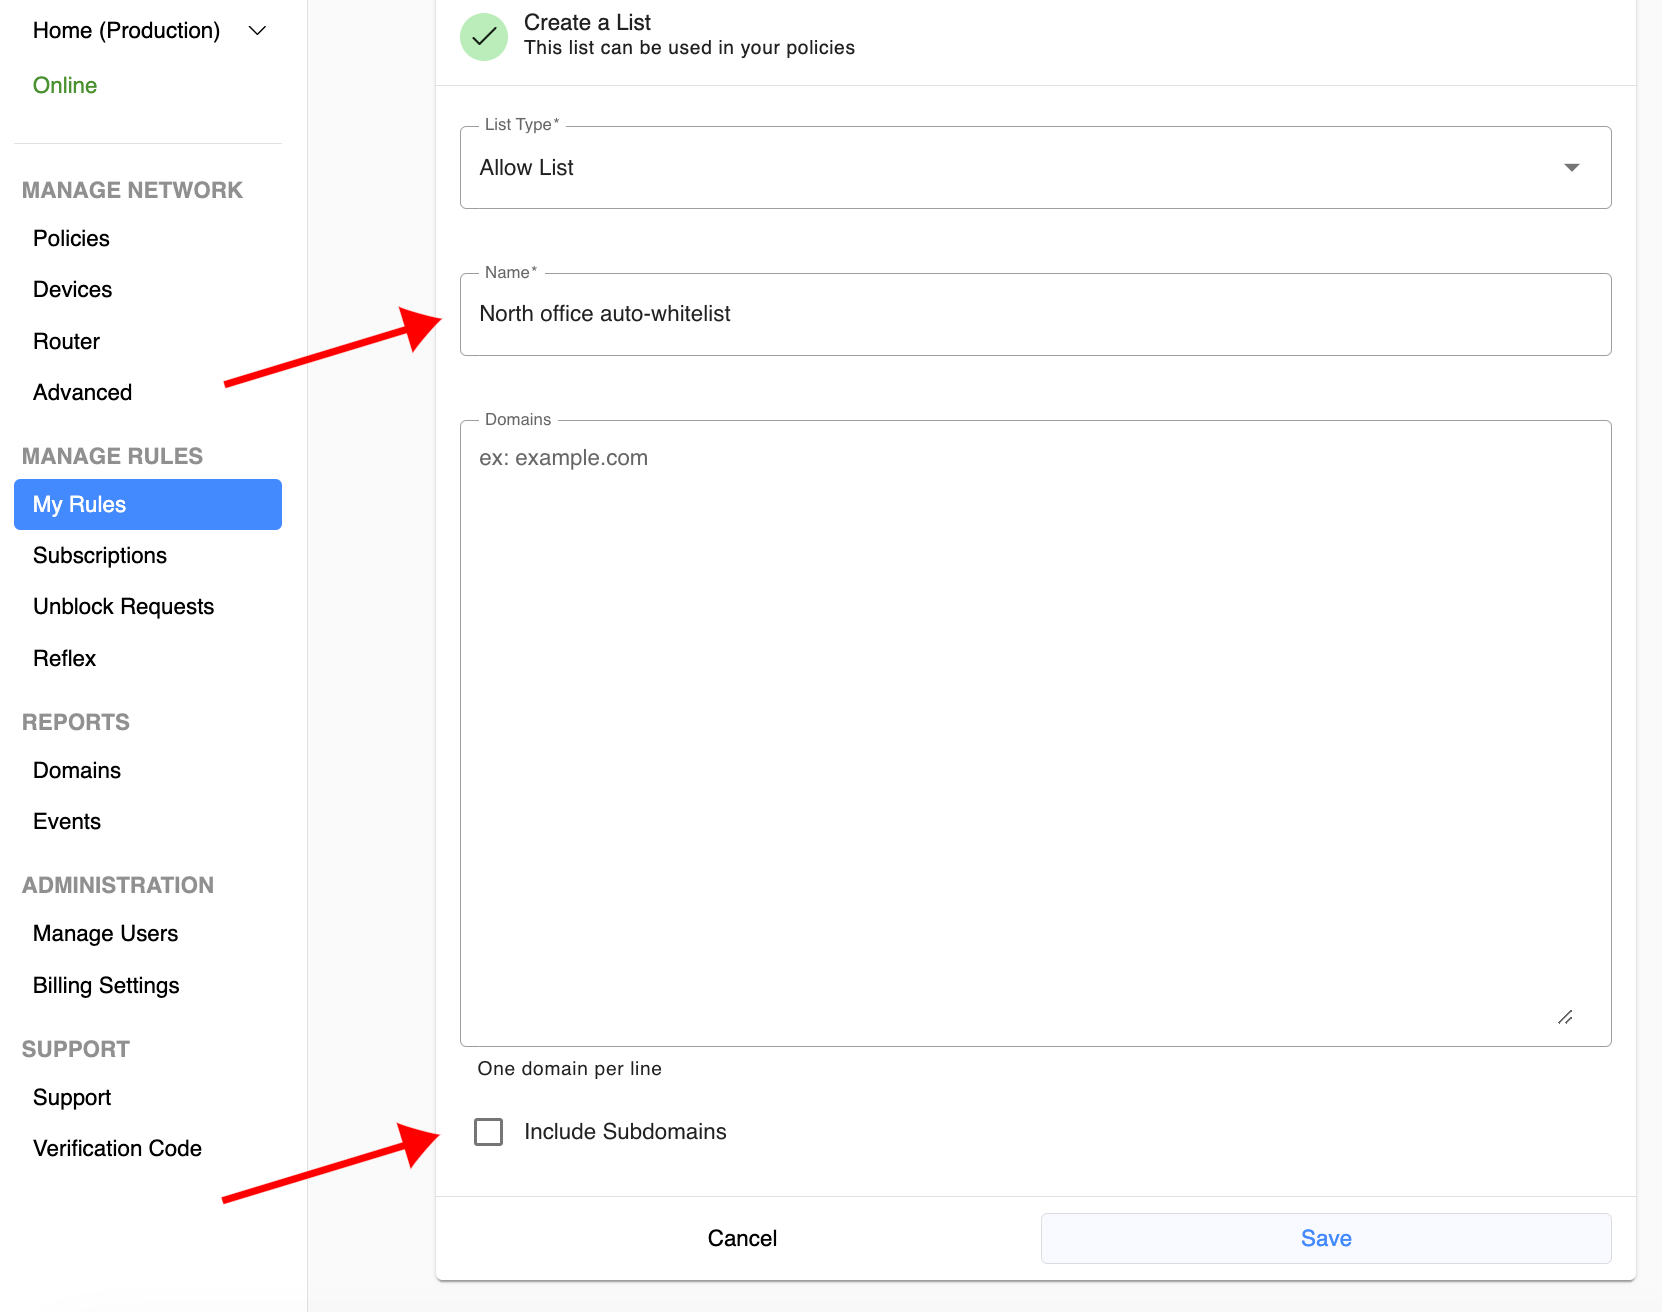
First create a list for auto-whitelisted entries, if you don’t have one already (cannot include subdomains, see later):
- Log into your dashboard
- Go to MANAGE RULES → My Rules
- Click on Add List
- Choose “Allow List” as the type
- Name the new list (e.g. “North office auto-whitelist”)
- Uncheck “Include subdomains” and Save as shown below:
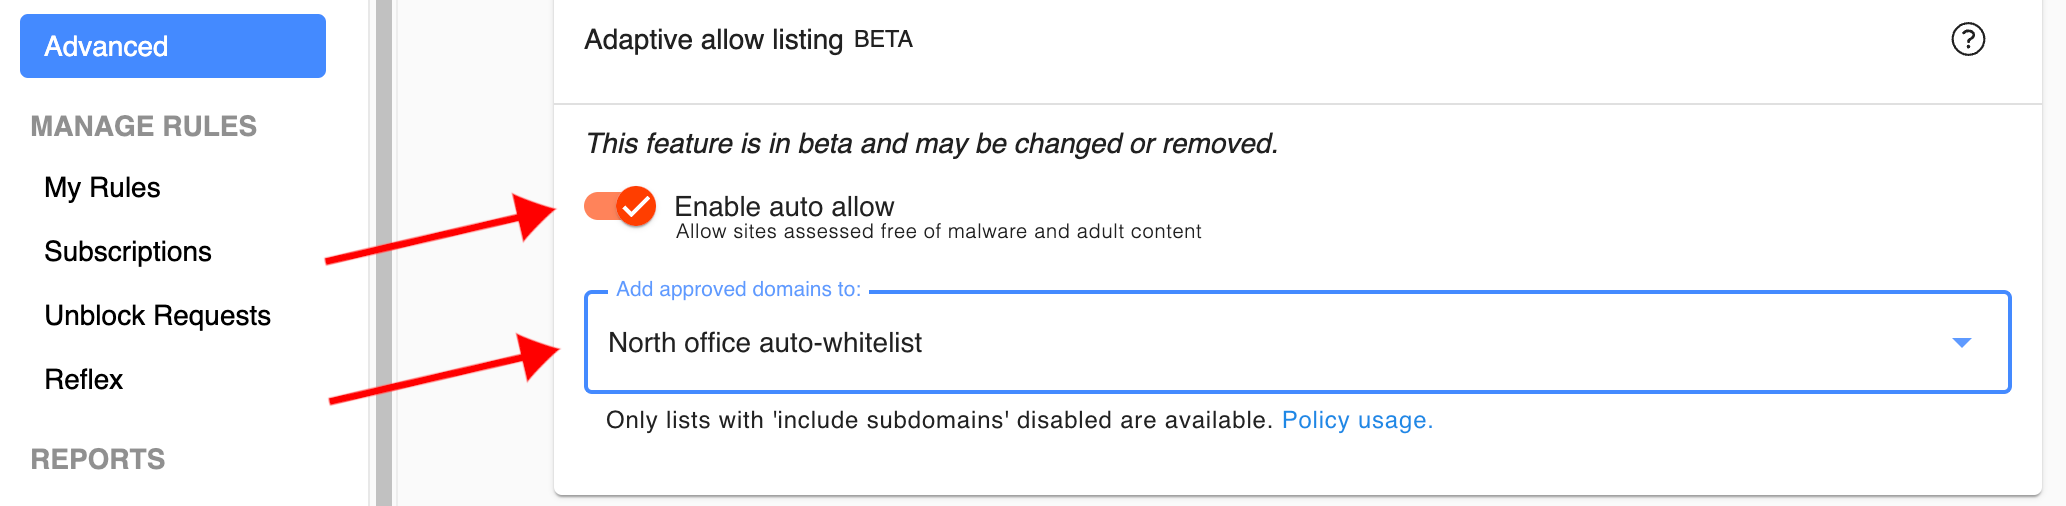
Next, to enable auto-whitelisting, follow these final steps:
- Log into your dashboard
- Go to MANAGE NETWORK → Advanced
- Enable “auto allow”
- Select the new list created above
Finally, make sure your newly created list is turned on for the policies where you want it to apply (MANAGE NETWORK → Policies).
To make sure your desktop browser experiences “unblock requests” feature for https-blocked destinations, be sure to use this extension: