We frequently are asked if pfSense can be deployed in an existing environment with non-pfSense gateway and just use the DNS services as a stand-alone device for the purposes of DNS-based filtering.
This article describes how to achieve that. However, it is important to note that egress control, DNS enforcement, on-premise IP enforcement are all impossible in stand-alone mode. With that context, the single-NIC mode is still useful for the purposes of evaluating if ADAM is a fit for your environment for the purposes of light-weight on-premise DNS filtering.
In this how-to it is deployed as a virtual machine with only one network adaptor installed. If you have a multi-NIC device, some of the screens and prompts will vary somewhat:
-
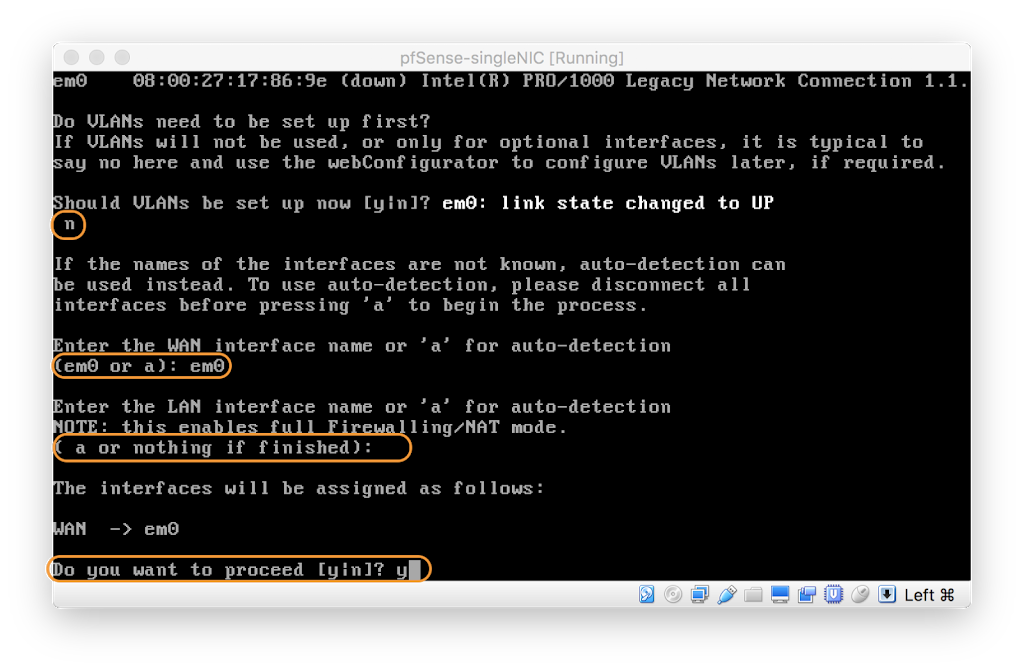
Deploy pfSense 2.3+ with a single network interface available/connected. These are the prompts to follow if you don’t use VLANs, or if your connected interface is connected to an ACCESS port that is already defined for the specific VLAN you plan to use:
-
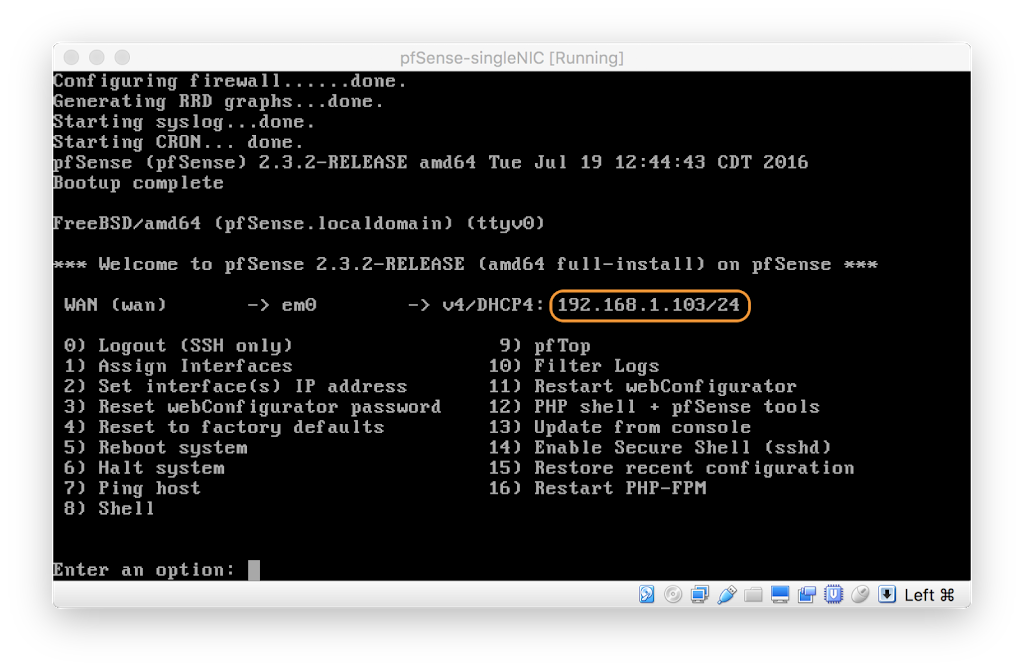
Make a note of your IP address on your console:
-
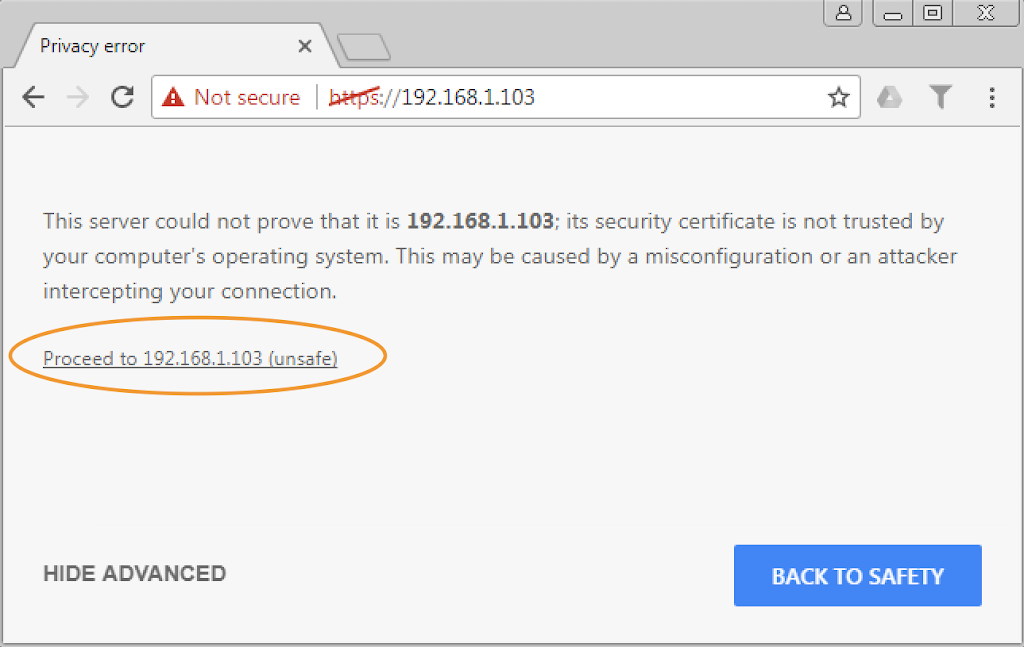
From a device on the same subnet, visit that IP address with https like this, go ahead past the SSL warning since at this point it’s a self-signed certificate:
-
At this point proceed with your pfSense setup as you normally would. pfSense has a fantastic community to help out with steps involved here.
- Complete the pfSense wizard including the wizard, IP assignment as you need it for your environment, and then return here for the next steps.
-
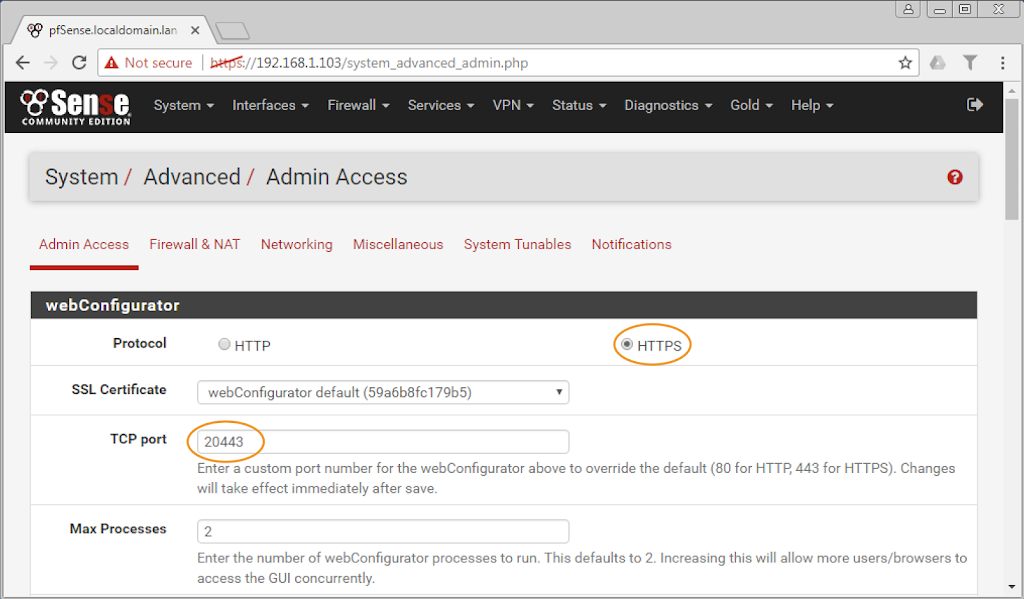
Once pfSense wizard has been completed, you’re happy with your IP assignment(s), it’s time to change the webUI to https and port 20443 (or any port above 1024 and certainly not 443), and then save and visit the UI at the new URL
-
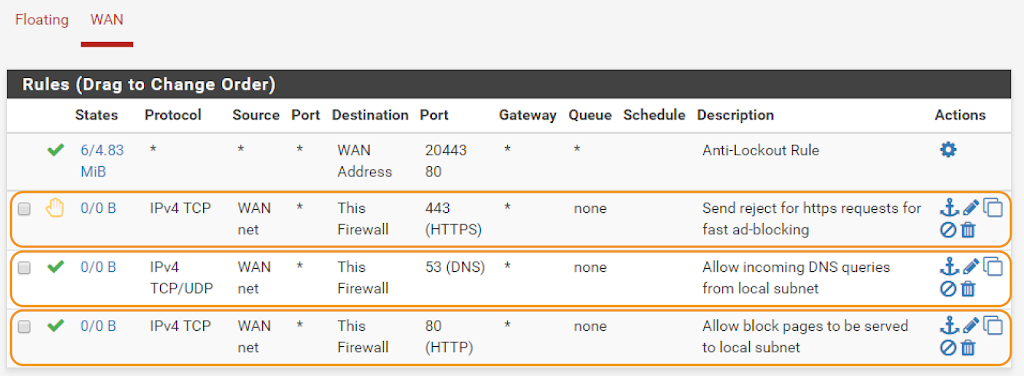
Now let’s create some firewall rules manually like this:
- Allow incoming DNS (important to allow both TCP and UDP )
- Allow incoming TCP port 80 to serve block pages
- Reject incoming TCP port 443 for fast ad-blocking attempting to load SSL ads/trackers/disallowed destinations
This is what your WAN firewall rules should look like (marked ones represent the above list):
-
And now, you’re ready to follow the steps to install ADAM found here:
Install adam:ONE on pfSense (legacy v3) -
Finally, you need to adjust your DHCP server settings to have all of your devices now use this pfSense host for DNS.
- This is a critical step as otherwise your devices are not using your pfSense for DNS
- In the case where you run Active Directory, before you point your domain-joined devices to pfSense, first create a Forwarding list of your internal domain(s) and follow this guide:
Active Directory Configuration - KB & Manual - ADAMnetworks
- Optionally implement a firewall rule on your edge gateway to disallow all outbound TCP/UDP port 53 traffic in order to prevent devices from circumventing your policy to have DNS answered by pfSense+ADAM.