This article will show you how to setup pfSense as a transparent bridge, and installing adam:ONE (DNSthingy) to filter all traffic.
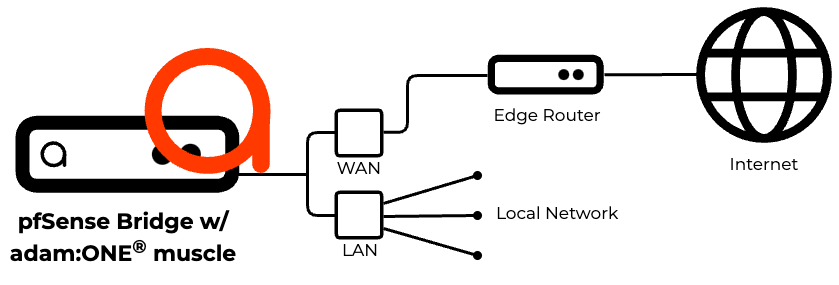
Configure pfSense in Bridge Mode
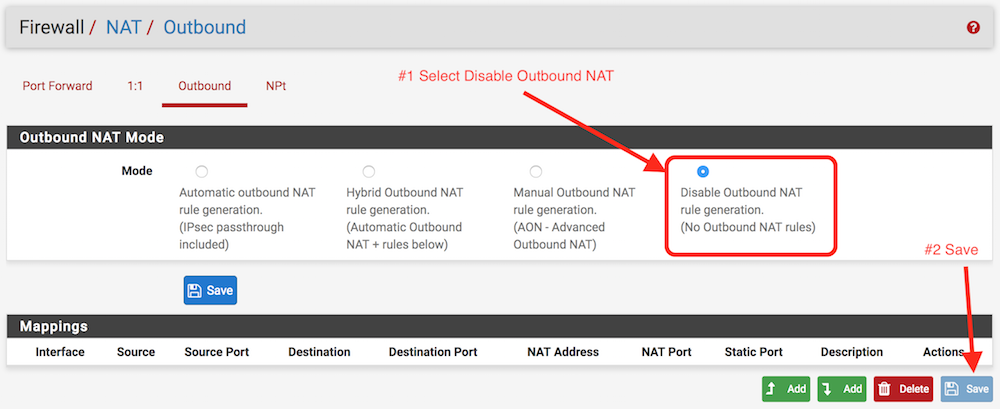
Disable NAT
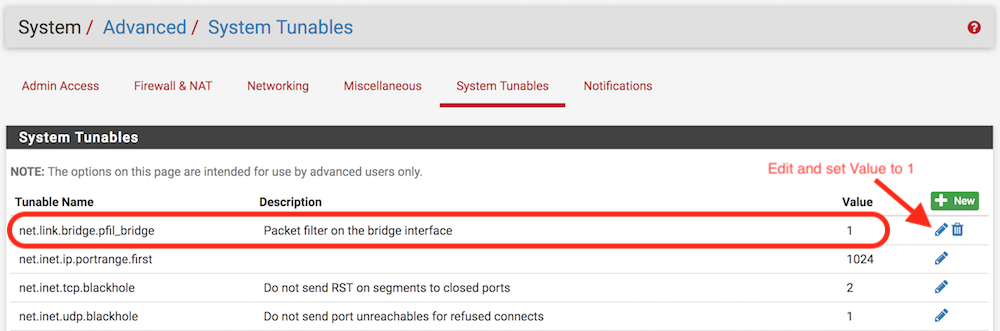
Enable Packet Filter for Bridge Interface
Find the setting called net.link.bridge.pfil_bridge and set the value to 1
Also change net.link.bridge.pfil_member to a value of 0
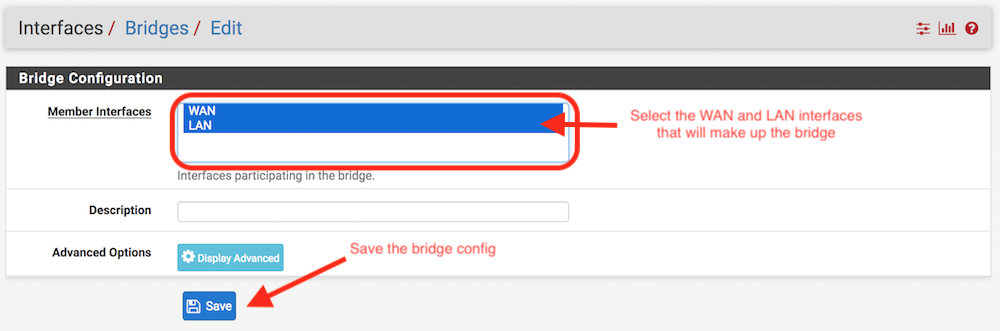
Create the Bridge
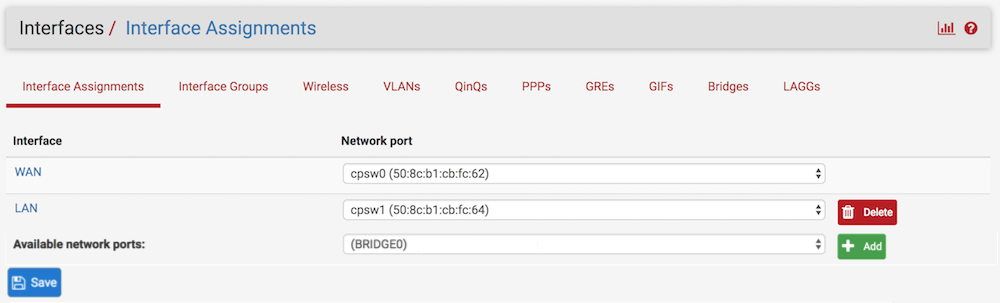
Go to Interfaces / Assignments / Bridges and click the Add button.
Back under Interfaces / Assignments select BRIDGE0 under Available network ports and click Add .
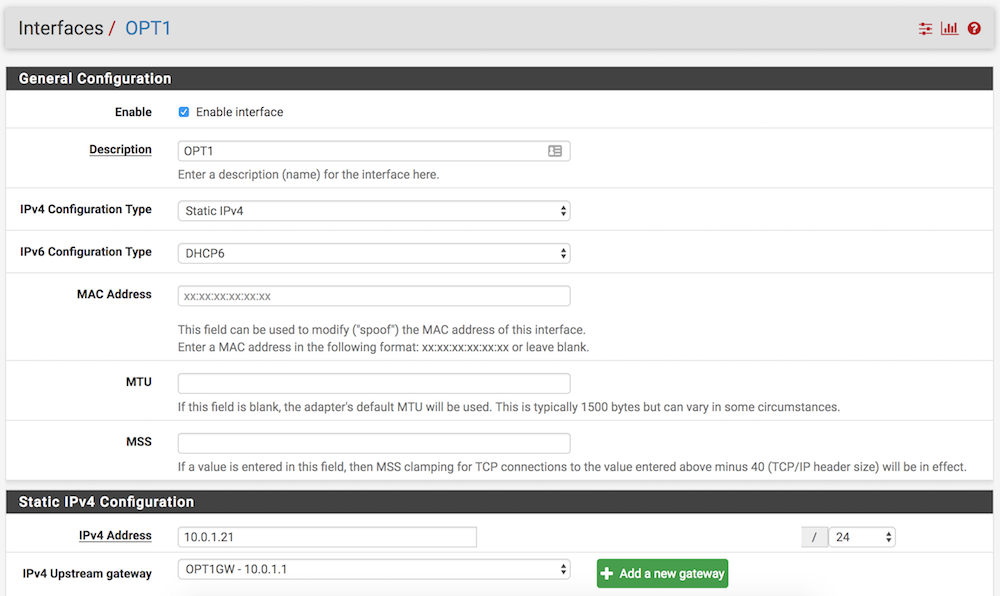
Enable the interface. Assign it a static IP address on your LAN subnet that you will use to access pfSense going forward. Add your upstream gateway, for example the IP of your edge router.
Now edit the WAN and LAN interfaces and set the IPv4 and IPv6 configuration type to None.

You may need to disable DHCP and DHCPv6 & RA first before removing the IP configurations.
Configure Firewall
Under Firewall / Rules select the WAN interface and create a rule that passes all traffic over the interface as shown below.

Now select the interface that was assigned to your bridge. Assuming you have a 2 interface pfSense box it’s probably OPT1.
Create a rule that passes any traffic to the OPT1 net (replace OPT1 with the appropriate interface) You may also need to create an IPv6 version.

Allowing DHCP over the Bridge
If your gateway provides DHCP service, create a rule that allows UDP port 67 to any.
![]()
DNS Client Configuration
Your DHCP server and any statically assigned devices should have their DNS server set to the bridge IP.
Finally, Install adam:ONE